You can use Apple methods to transfer iPad data to a new iPad or use data transfer software iMazing to transfer iPad data directly.
The excitement of getting a new shiny iPad can be overshadowed pretty soon due to the lengthy task at hand to transfer your old iPad’s data to a new one if you have hundreds of GB’s of essential data that you need to move to your new iPad. Whether you are one of those who click pictures with their iPad Pro or need to transfer your college files and assignments from your trusty old iPad to a new iPad Pro, you will need to know the best ways to transfer iPad data to a new device. Luckily, there are a few easy ways Apple makes it a breeze on moving data from old iOS or iPadOs to new iDevices. And if these Apple ways don’t suit you, there are third-party PC and Mac apps and tools available, such as iMazing, specifically tailored to help you transfer data through devices.
How To Back Up iPad Data And Transfer Data To New iPad- Official Way
Apple, over the years, has given the freedom and easy official methods for transferring data to a new Apple device and restoring all your data to your latest iPad, iPhone, or iPod. You can set up your data on a new iPad where you had last left off by backing up your data to the internet with iCloud or creating a backup restore on a computer using iTunes. These are the best official ways to back up iPad data and transfer data to a new iPad, and we are here to guide you through all of them.
Solution 1-How To Transfer Data To New iPad Using iTunes
iTunes is a stock Apple suit app wizard for connecting an iPad, iPhone, or an iPod, for transferring photos, updating an iPhone, and for this tutorial, help you create a backup for your data for your old device and restoring it back to your new iPad and successfully transfer data to new iPad. The main advantage of using iTunes over backing up your data on iCloud is that you are not restraint from the iCloud backup data limit, and even in most cases, you will not need an internet connection. Here is how to transfer iPad/iPhone data to a new device
Things you will need
- A PC or a Mac (Windows).
- iTunes installed.
- A USB to Lighting cable.
- Your previous and new device.
Step-1 Follow these steps on your previous device to backup iPad with iTunes
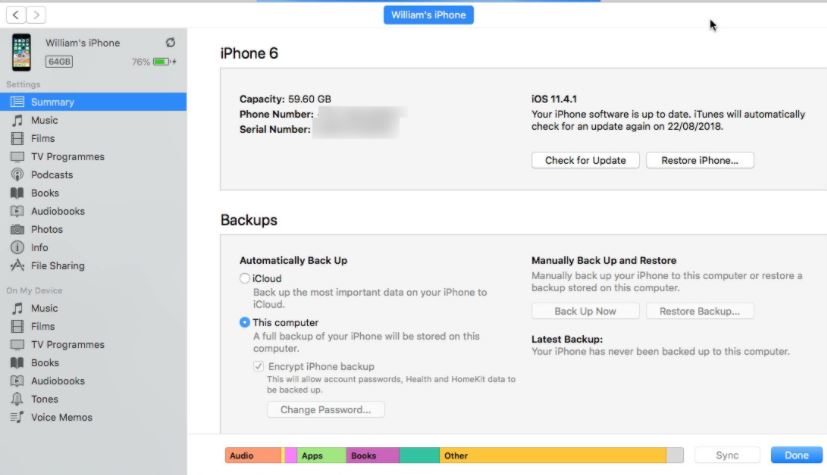
- Connect your old device with USB to Lighting cable and open iTunes.
- Click on the Device icon.
- From the drop menu, click on Summary.
- From the Summary page, click on Back Up Now.
- The backup process will start, and it might take a few minutes, depending on the size of the files and data.
Step 2- Follow these steps to restore iPad data to the new iPad
Note: If you have set up your iPad and have some apps and data on it, we advise you to reset the iPad and start fresh before restoring your old data to a new device.
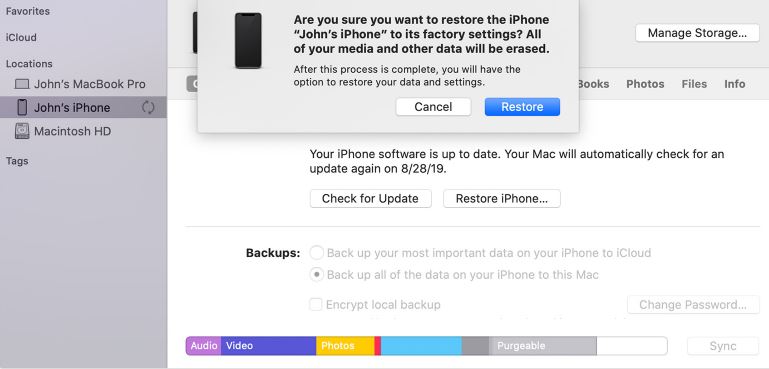
- Connect your new iPad to a PC using the USB to Lightning cable and open iTunes.
- Click on the Device button.
- From the drop menu, choose Restore Backup.
- Select the right backup if you have multiple device backups. Look for the last backup which you have made for transferring to the new iPad.
- After selecting the backup version, click on Restore, and the process will begin.
Solution 2- iPad Wireless Data Transfer Using iCloud
iCloud is Apple’s cloud storage solution, and with the relatively affordable storage plans and ease of use, people who have invested in the Apple ecosystem can access their images, data, files, and purchased iTunes items from any iDevice through the iCloud drive. And using iCloud, you can backup all your data and have it restored on your new iPad wirelessly. This method is ideal for iPad wireless data transfer to transfer data to the new iPad. You will just need a stable Wi-Fi connection, enough iCloud storage for the iPad, and your Apple id and iCloud credentials to backup and restore your data to your new iPad. Here is how to backup data from your previous iPad and restore it on a new device.
Note: Through iCloud, you can backup and transfer app data, device settings, messages, photos, videos, purchase history from Apple devices. But, if you have turned on iCloud Photos, these data will not be included in the iCloud backup.
Things you will need
- Same Apple ID on previous and new iPad.
- Enough iCloud storage for the iPad data to be backed up.
- Stable Wi-Fi connection.
- It is advised your devices should be plugged into a power source.
Step-1 Follow these steps on your previous iPad
- On your old iPad, head over to Settings.
- Tap on your profile picture.
- Select the iCloud option from the menu.
- You will see your iCloud storage status above. Tap on the toggle switches on the apps you wish to back up. For apps, iCloud will back up app data.
- After selecting apps, you wish to backup, head over to the iCloud Backup option.
- Then tap on Back Up Now. The backup process will start and may take a few moments, depending on the backup size.
Step 2- Follow these steps on your new iPad
Note: If you have already set up your iPad, you will need to reset your iPad to restore your iCloud backup on your new iPad. Here is how to reset your iPad.
- Head over to the settings app.
- Tap on the General tab option, and then tap on Reset.
- From the options, tap on Erase All Content and Settings.
If you are setting up your iPad for the first time and need to restore your iPad with the iCloud backup, jump right into it.
- Power on your new iPad.
- Set up your iPad following the steps until you reach the Wi-Fi screen.
- Connect with a stable Wi-Fi connection.
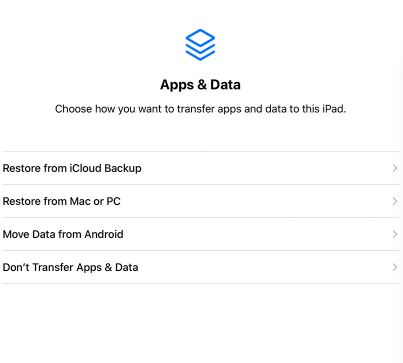
- Set up the iPad until you see the Apps and Data screen.
- From the list, tap on Restore from iCloud Backup and sign in with your iCloud credentials.
- Select the backup you just made through your old iPad.
- The transfer process may take some time depending on the file sizes. After the process is finished, finish setting up the rest of the setups.
- You will see your data on your new iPad.
Transfer Data Directly From One iPad To Another Using iPad Data Transfer Software iMazing
Third-party iPad data transfer software like iMazing for iDevices is a godsend due to iTunes being fussy at times, and iCloud backups are dependent on an iCloud monthly data subscription plan for your iPad data backup from your previous device. iMazing is one of the best tools for managing iDevices on the fly, and t is the best service for transferring data from one iPad to another or several iPads through a wired connection. iMazing is one of the best iPad data transfer software that gives you the options for your old iPad with the choice of backing up and installing specific apps and data and restore them to your new iPad in a single connection. Here is a step by step guide on how to perform a backup and restore from your old device to a new device. This method is similar for iPad, iPhone, and iPod Touch, and the service interface is similar for both Mac and Windows.
To prepare the transfer, you will need to turn off Find My iPad/iPhone from the settings on your old device.
How To Disable Find My iPad
- Go to the Settings app on your old iPad.
- Tap on your profile image.
- You will find the Find My option. Tap on it.
- Then tap on Find My iPad.
- Tap on the green toggle switch, and you will be prompted to enter your Apple ID credentials. After, that you are good to go for transferring your data from your old device to the new one.
Follow these steps after disabling Find My iPad.
- Connect your old and new iPad devices using a USB cable.
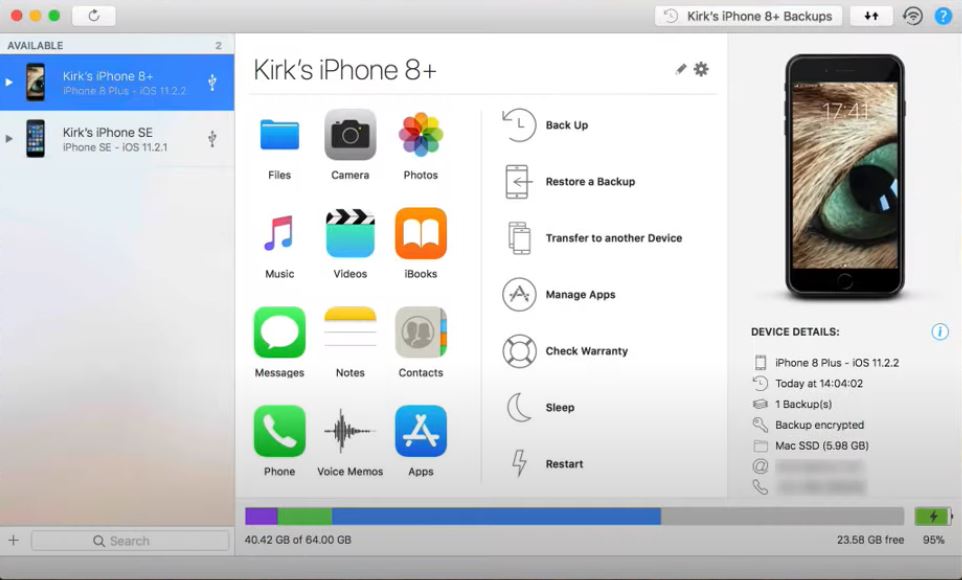
- Open the iMazing service tool.
- You will see your devices on the left-hand side. Select the old device which you want to transfer data to a new device.
- On the main screen of iMazing, click on the Transfer to another Device.
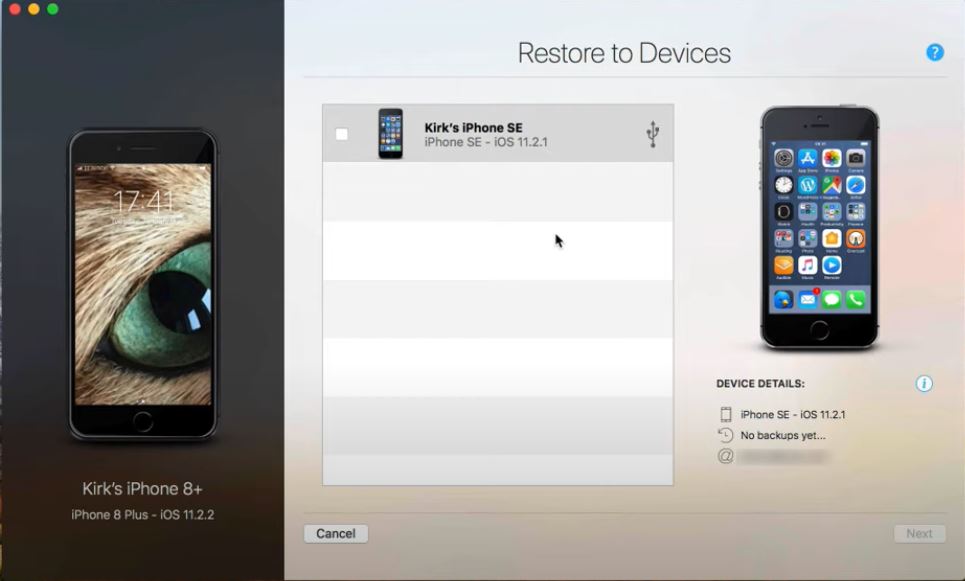
- Select the new device which you want to restore the data if you have multiple devices connected at once. Then click on the next option.
- On the next screen page, you will be given the option to choose Data, Apps, Erase target device, and Name for the target device. You can customize each menu or leave it at default.
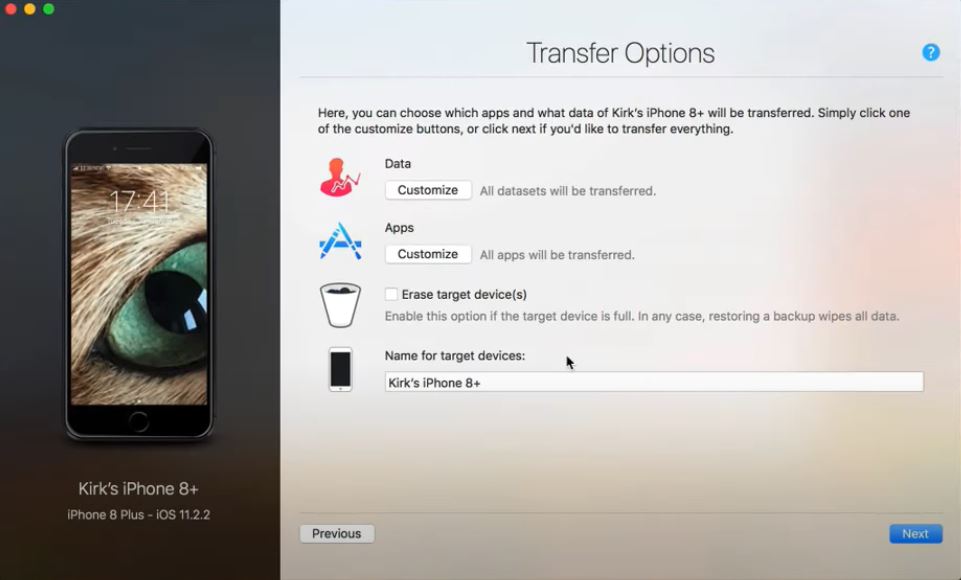
- After making the selections, click on next.
- Confirm your transfer by clicking the Transfer button on the bottom left.
- Your process will begin. It will take a couple of time to finish the process. You can minimize the wizard if you wish.
- After the process is finished, click on the Done button.
Final Words
You can use Apple methods to transfer iPad data to a new iPad or use data transfer software iMazing to transfer iPad data directly. There is no doubt taking a backup of an iDevice and restoring the data to a new device has come a long way for the official Apple methods. But, there are times they don’t work for you, or there are some derivatives that you don’t have an account for, such as keeping an eye out for iCloud Backup data subscription for backing up your device. iMazing bypasses all the hassle and lets you transfer your old iPad data to your new iPad data. We hope our guide for Apple official and Third-Party services for transferring data has helped you to do so effortlessly.