Do you want to find out the best way on rooting Redmi 3S Prime? This tutorial will guide you on rooting Redmi 3S Prime the hassle-free way.
Xiaomi released the successor to its most famed Redmi series this August, badging it the Redmi 3S Prime. The Redmi 3S Prime comes with a Qualcomm Snapdragon 430 processor, 3GB RAM and goodness of MIUI 8; the specs are beefy for the price and one Android root away to unleash full authority on the Redmi 3S Prime.

If you are among the Android users who want to fiddle with android and cannot tame your horses to learn how to root Redmi 3S Prime, you have come to the right place, but doing so, you will lose your warranty if you are doing on a new device. We have curated the simplest way to root the Redmi 3S Prime.
Note: This is a “not so basic” guide, proceed with caution.
How to Root Redmi 3S Prime
Part 1: Unlock the Bootloader on your Device
The first and foremost thing before you can begin rooting the Redmi 3S Prime, you need to unlock the bootloader on your device. To do so, you need to download and install the Mi Flash Unlock Tool on your Windows computer.
Before proceeding, make sure that you back up all your data on your device and proceed at your own risk. Also, make sure that the phone is at least 50-60 per cent charged before you unlock the bootloader of your device.
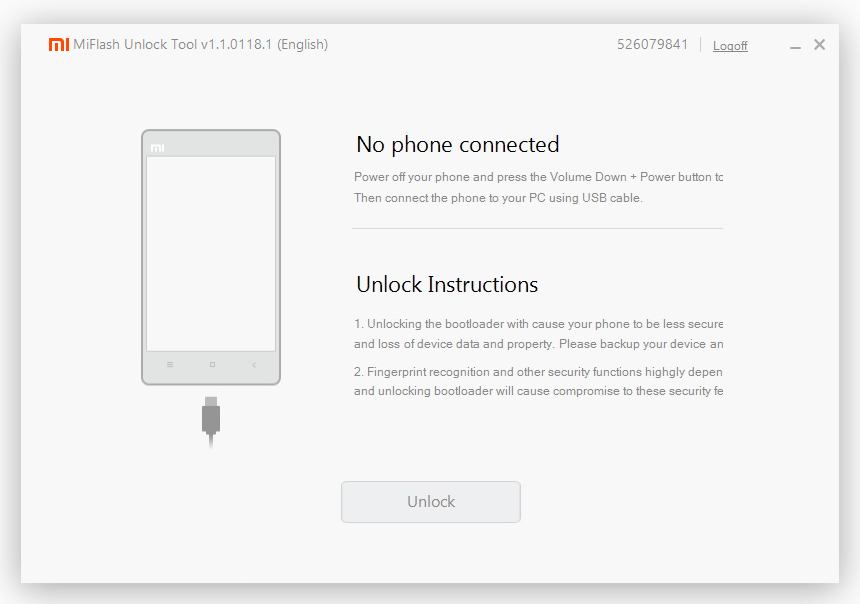
1. Begin by extracting the downloaded files to your desktop and open the MiFlashUnlock.exe file.
2. A disclaimer will nudge you, so read the terms and agreements and press “agree” to continue.
3. The next step will require you to log into your Mi account, enter your information and press “Sign in” to continue with the next step.
4. Once you have logged into your Mi account, the authentication process will begin on your phone, and you should see a message “You don’t have the permission to Unlock the device”.
5. To get the required permissions, head over to the MI Unlock webpage and click on “Unlock Now” and log in with your Mi account details.
6. The next page will ask you to input your name, your mobile number and your reason for unlocking the bootloader of your device.
7. Once you have entered the details and clicked on “Apply Now”, you will be redirected to another page and asked for the OTP (one time password) you have just received on the mobile number you provided earlier.
8. Once you enter the OTP and verified, go back to the Mi Flash Unlock Tool on the computer and unlock the bootloader.
Part 2: Rooting the Redmi 3S Prime
There are some files you will need when you continue with the process on how to root Redmi 3S Prime. Download using the links provided below.
- ADB and Fastboot drivers for Windows here.
- TWRP Installer for Redmi 3S/Prime here.
- SuperSU.zip file here and paste on the internal storage of your device.
1. Go to Settings->About->Build Number and tap on it seven times to get access to the Developer options menu.
Now go back to the Settings app, and you will see the newly unlocked options. Tap on it and then press the toggle switch for the “USB debugging” menu and “OEM unlocking”.
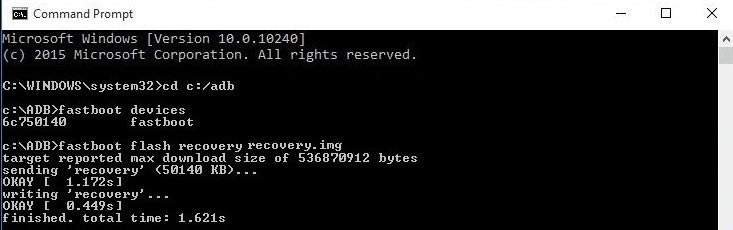
2. Please create a new file on your desktop and copy all the downloaded files into it for ease of use later on. Now open the twrp-installer.bat file as an administrator.
3. Now power down your smartphone, press and hold the Power and Volume Up button to get access to the Fastboot mode and connect it to your computer via a USB cable.
4. After installation, your phone will boot into its custom TWRP recovery mode, from where you can directly root it.
5. Using the navigation menu, tap on the “Install” option, then you will be prompted to access location where you had stored the SuperSU.zip file in the internal memory of your phone, select “Install Image” and swipe to confirm.
The process will finish, and then you can press the “Reboot System” button, and you will see the SuperSU app installed after the device restarts.
Was this tutorial on how to root Redmi 3S Prime helpful in unlocking the maximum potential of your device? If you need more visual assistance with the process, check out the video tutorial given down below.
Related Posts.
- Rooting Coolpad Note 3. The Straight Forward Way
- Rooting Android Device? The Right Tools You need
- Rooting Redmi 3S Prime. The Hassle-Free Way
- Want to change Launcher Android Has Installed?
- 5 Hacking Tools For Android.
- How To Repair SD Card Crashing On Android?
- How To Clear App Cache And App Data On Android?
- Guide To Android Rooting. Everything You Need To know.