
Now we go and look into the 10 Hidden Features in Windows 10 you Probably Don’t Know About but should try out if you’re a full-time user.
For as long as the idea of the “personal computer” has existed, Microsoft has been instrumental in bringing it to the world at large. From Bill Gates jamming it out with a team of nerds working on the very first Windows 1.0 back in 1985, to the grand release of Windows 10 cross-platform operating system in 2015, the most popular software platform has taken quantum leaps in the past 30 years of its existence.
From the addition of its very own voice-enabled virtual assistant, Cortana, to the robust and well-curated Microsoft Store to find a gigantic collection of apps, there are a bunch of flagship features on which Windows 10 has been marketed virally. However, it is the hidden features and those nifty little tricks hidden between the lines that make Windows 10 stand apart from all of the predecessors that came before it.
Related:
10 Hidden Features in Windows 10
Regardless of whether you’re a beginner starting off with Windows 10 or one of the early adopters, there are some useful hidden or less apparent features that you might’ve overlooked. We’ve dug deep into Microsoft current PC operating system and found some truly versatile gems that are hidden in plain sight, so here are the best hidden features in Windows 10 that you probably don’t know about, but are definitely worth looking into.
Sort out space-hungry files and apps
The problem of low storage space has haunted computer devices for decades and it continues to do so. The easiest method to counter this problem has been sorting out files and applications that take up too much space, and Windows 10 makes it easier to find these storage-hungry apps.

- On your Windows 10 PC, head over to the Settings app.
- Navigate your way to System – Storage menu.
- Click on any one of the drive available to see details of how much space apps and files take up.
- You can also head over to Settings – Apps & features to use the Sort by tab and list apps based on their sizes.
Personalize your PC
While the ability to add your very own themes to Windows is not an entirely new feature, but Microsoft lets you truly personalize your visual experience with Windows 10. You can off right at the Lock Screen itself and add your very own personality to it with your own images or select from the standard set that Microsoft has included.
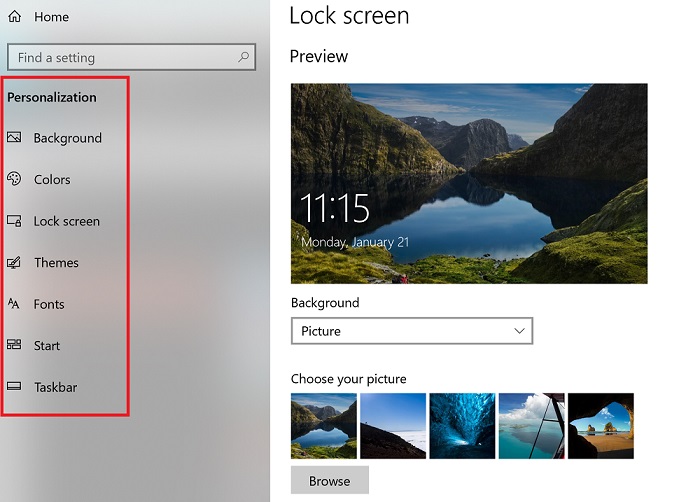
- On your Windows 10 PC, head over to the Settings app and search for Themes.
- Under the Themes menu, you can start personalizing with Background (wallpaper).
- Add your preferred accents with Colors to match the background automatically or select one that suits your style.
- Use the Lock screen menu to find a welcome image and details such as Calendar, Email, SMS, Phone and more under Quick Status.
- Additionally, you can head to the Themes section to find thousands of choices to fetch from the Microsoft Store.
Optimize battery life
Up until now, Windows OS was mostly focused on desktops, which is why most battery-conserving features were developed by the laptop manufacturers and not Microsoft itself. However, it all changes with Windows 10 since it was initially intended for use on not just personal computers and laptops, but tablets and smartphones as well.
- On your Windows 10 PC, head over to the Settings app and search for Battery.
- Use the Battery saver feature to set up a failsafe for when the battery percentage drops below a certain level.
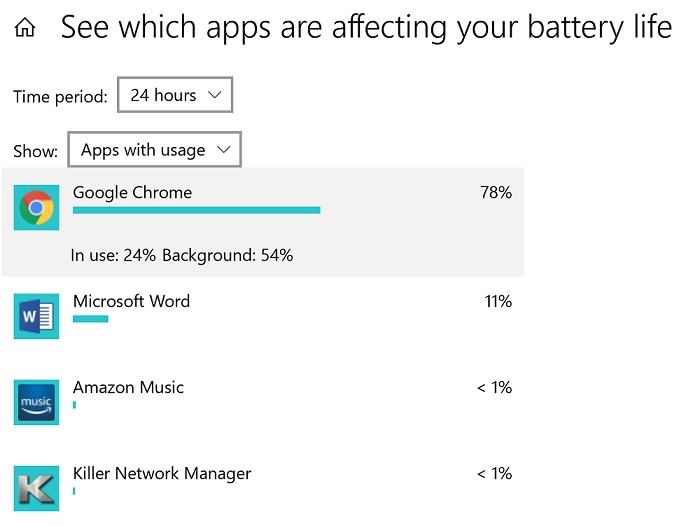
- Open the menu that reads – “See which apps are affecting your battery life”.
- Select the Time period menu to see which apps affect the battery life for a prolonged period of time.
- Click on each of the app icon to find out the In use and Background percentage of battery use.
Keep Cortana away
While the ability to be able to communicate with a smart assistant through your voice is admirable, not everything about Cortana is perfect. For instance, since Cortana is granted permissions to make your user experience better, it cycles through all of your personal information, and if you’re concerned about the privacy risks, you can do something about it.
- On your Windows 10 PC, head over to the Settings app and search for Battery.
- Look for the Privacy tab and then access Speech, inking & typing menu.
- To stop your speech communication with Cortana and clear user dictionary and suggestions, press “Turn off speech services and typing suggestions”.
Use the God Mode
In order to make the user interface simpler and easy to understand, Microsoft has humanized Windows 10 to an extent. But for all of your expert users who want a real hands-on experience on their computer, there is a feature called God Mode built in. This allows you to get into the deep options and settings of your computer in a single and unified window screen.

- Go to desktop screen on your Windows 10 computer.
- Right-click anywhere on the screen and select New – Folder.
- Right-click on the New Folder and select the Rename option.
- Enter the following code (without the captions) and save it – “GodMode.{ED7BA470-8E54-465E-825C-99712043E01C}”.
- A new icon will be created on the desktop, which will open the God Mode window for unprecedented access to your computer.
Virtual Desktops for a multi-screen experience
If you’ve always wanted the added screen space to work with utmost comfort, but can’t enjoy that luxury due to budget restrictions or because you use a laptop, there’s a solution that Microsoft has come up. Thanks to Windows 10 Virtual Desktop feature, you can create multiple different virtual screens and use them as separate displays to keep your work screen separate from your viewing screen.

- On your keyboard, press the Windows + Tab button to see the Overview display.
- At the top-left corner of the screen, press the + New desktop button to add a new virtual desktop screen to your computer.
- Follow the same method to add up to 10 different virtual displays on a single Windows 10 PC and run them at once.
Silent those pesky notifications
One of the most annoying problems with mobile phones is the unending sequence of useless notifications, and the same issue has carried over to Windows 10 as well. While the notification cards to make it easier to stay connected, unwanted sound alerts from third-party apps can be seriously sticky business. This is where the ability to filter notifications from apps comes in handy, and here’s how you can do it:

- On your Windows 10 PC, head over to the Settings app and search for Notifications and actions.
- Under the Notifications tab, choose the way you wish to view incoming notifications and alerts.
- Scroll down to the “Get notifications from these senders” menu and select which apps you don’t wish to receive notifications from by turning off the toggle switch.
Control your smart home
With the increase is smart devices, connected home are becoming a reality quite rapidly, and Microsoft has added Cortana to the band wagon. One of the many skills included with Cortana on Windows 10 is the ability to operate and manage your smart devices from the virtual assistant on your computer itself.
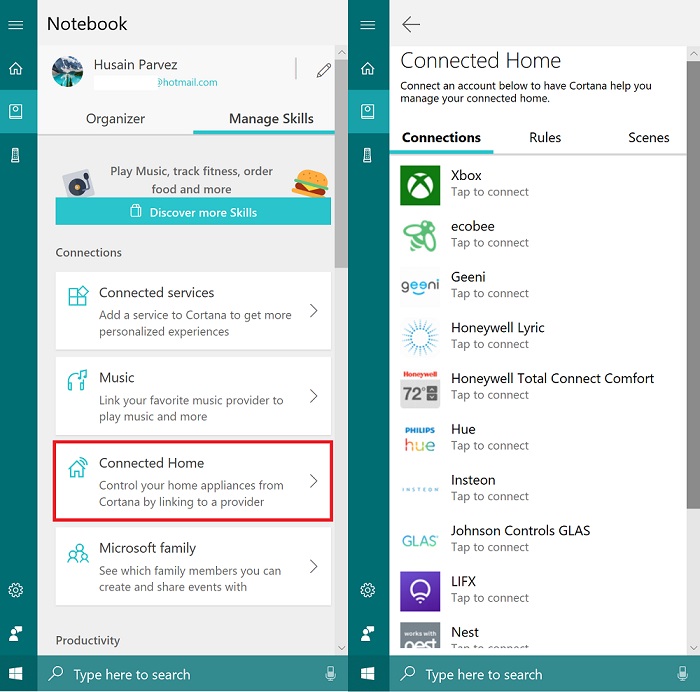
- Select the Cortana button right next to the Start button.
- Click on the Notebook icon and then select the Manage Skills tab.
- Press the Connected Home button and look for compatible services available from the pop-up tab.
- Open either of the compatible services, log into them and make sure to enable the toggle switch next to Enable Connected Home option.
Which of these useful and seemingly hidden features of the Windows 10 operating system is your absolute favorite to use? Do you have any other impressive feature that you’d like to mention but has been looked over? Be sure to mention it in the comments section right down below and we’ll be sure to check it out.


